Before reading this section, review the terms introduced in the Interface Overview and Editing Overview sections.
View commands allow you to see a more detailed graph of part of the sound. They are similar to zoom commands in the Windows Paint accessory. When you zoom in (or magnify) the sound, you see a smaller section, but with greater detail. When zoomed out, you see the entire sound, but with less detail. The Overview box near the bottom of each Sound window gives you some information about what section of the sound is currently shown in the view (see the Main Window figure).
When zoomed in on part of the sound, a scroll bar appears at the bottom of the Sound window for moving to different parts of the sound while still keeping the same level of magnification. Clicking-and-dragging the waveform with the middle mouse button (wheel button) is another way of moving around.
Most view commands use the start marker's position as the starting location for magnification, so you should move the start marker to the position of interest first.
Use the Options | Window command to set the initial zoom level when a file is opened.
The entire sound is graphed in the view. In other words, it zooms all the way out so that the entire sound is visible. You can move the start and finish markers to select any part of the sound.
Use Specify to magnify the Sound window graph to any specified level. The level can be given as a time length or as a ratio.
Use the Length option to specify the amount of time to show in the graph. For example, use 1:00 to show one minute of audio.
Use the Ratio option to specify the number of samples samples mapped to a single pixel on the screen. Values greater than 1 display an approximation of the waveform. Values less than 1 (such as 0.1) reveal individual samples.
Start time sets the position in the file to begin drawing the magnified waveform. If the given level is not possible, the closest valid level is used.
Use Selection to magnify the selection, increasing the detail of the graph. You can zoom in many times by changing the selection and magnifying it again until only a single sample is shown in the view.
Click-and-drag the right mouse button over the waveform to zoom in without changing the selection.
Use Preset to magnify to the view to a favourite level. The sound is magnified to the level of detail specified in Options | Window. The level can be set to any preferred value.
Use Previous to return the view to the previous zoom level. Use this to switch back and forward between two different zoom levels.
When checked, Follow Playback scrolls the view automatically to follow playback and recording. Scrolling occurs only when zoomed in and when the current playback or recording position goes outside the view. This feature also enables keyboard navigation, which allows the playback marker to be moved via the keyboard.
Magnifies the sound by a factor of 1.33x. This gives 33% more detail, but shows 33% less sound. The middle of the view is used as the zoom center. This command complements Zoom Out.
Click-and-drag the right mouse button over the waveform to zoom in on any part of the sound.
Reduces magnification by a factor of 1.33x. This gives 33% less detail, but shows 33% more sound. The middle of the view is used as the zoom center. This command complements Zoom In.
When the number to the left of the colon is greater than the number to the right, a very small section of sound is magnified at a high level of detail. At these levels, individual samples are easily visible.
At a level of 1:1, each audio sample is represented as a single pixel on the screen. This reveals a true representation of the shape of the sound.
These show the given amount of time beginning at the start marker's position. Use View | Finish to see the audio at the end of the selection.
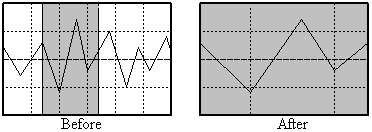
Vertically zooms all the way out so that the entire vertical amplitude range of the sound is shown.
Magnifies the graph vertically to show 1.33 times as much amplitude detail. Zooming is centered on the horizontal center of the view.
Reduces vertical magnification to show 1.33 times less amplitude detail. This show a larger range of the amplitude. Zooming is centered on the horizontal center of the view.
These commands scroll the view to either the start or finish marker's position. The view is centered over the marker's position provided its position and the level of magnification permit it to be centered. These commands are especially useful when you need to move a marker to a precise position. For example, you can zoom in 1:1 and move the start marker to an exact position and then use View | Finish to set the finish marker's position.